
Pest Control snapshot setup guide
Install, brand and launch the snapshot in about an hour. Follow the steps in order.
Setup checklist
Load the snapshot
From the agency view, go to Sub-Accounts, open the account menu and choose Load Snapshot, or select this snapshot when creating the sub-account. Import all assets and switch into the account.
Fill in the business profile
Go to Settings > Business Profile and enter the business name, address, phone, website, pest control license number if you display it, and time zone.
Set your custom values
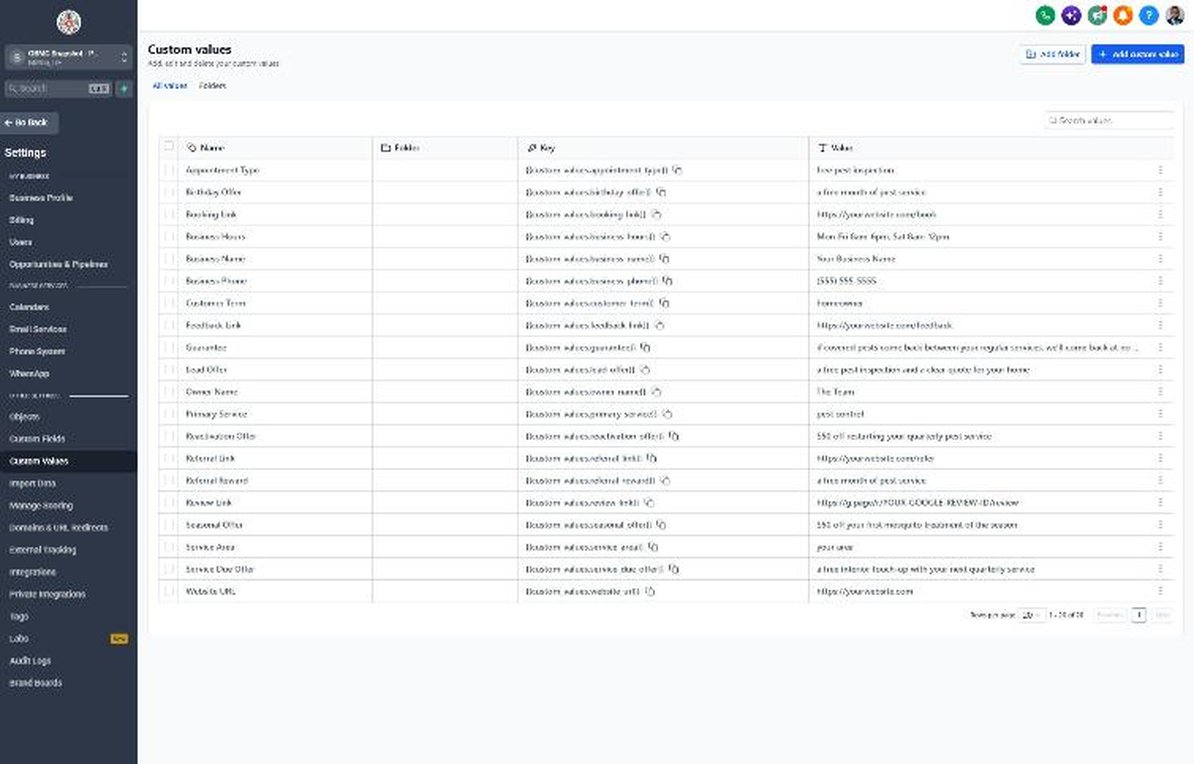
Go to Settings > Custom Values and fill in business name, owner name, phone, service area and the booking, review, feedback and referral links. Set the guarantee, seasonal and reactivation offers to match what the company actually honors.
Connect a phone number and register A2P
Go to Settings > Phone Numbers to buy or port a number and enable missed-call text-back. Complete A2P 10DLC registration in the Trust Center before sending any campaign.
Set up email sending
Go to Settings > Email Services and add a dedicated sending domain. Add the DNS records and verify it so service reminders land in the inbox.
Configure the Free Pest Inspection calendar
Go to Calendars > Calendar Settings and open Free Pest Inspection. Assign technicians or an inspector, set availability by route day if needed, then copy the booking link into the booking_link custom value.
Customize the quote form
Go to Sites > Forms > Builder and open Request a Quote / Booking Request. Confirm Pest Type, Infestation Severity and Property Type, add the SMS consent checkbox, and embed it on the website.
Connect Google Business Profile and reviews
Go to Settings > Integrations and connect Google Business Profile. Then go to Reputation > Settings, copy the review link and paste it into the review_link custom value.
Import customers with plan status
Go to Contacts > Import and upload active, one-time and canceled customers with consent status, Service Plan Status and Last Service Date. This feeds workflows 14, 19 and 21 and keeps active members out of win-back offers.
Assign staff and alerts
Go to Settings > My Staff and add office staff, technicians and the owner with mobile numbers. Update the alert steps in workflows 01, 02, 03 and 13 under Automation > Workflows.
Publish the workflows
Go to Automation > Workflows, review each workflow's copy, and switch it from Draft to Publish. Keep 14, 20 and 21 in draft until you're ready to launch each campaign.
Go live test
Submit the form, book an inspection, call and hang up, and reply to a text. Confirm every SMS, email and team alert fires, then delete the test contact.
Custom values: fill these once
All 21 workflows pull from these values, so your client's name, links and offers show up everywhere. Pre-filled pest control defaults are shown; replace the business details.
| Custom value | Pest Control default |
|---|---|
| Business Name | Your value |
| Business Phone | Your value |
| Owner Name | Your value |
| Website URL | Your value |
| Booking Link | Your value |
| Review Link | Your value |
| Feedback Link | Your value |
| Referral Link | Your value |
| Service Area | Your value |
| Customer Term | homeowner |
| Appointment Type | free pest inspection |
| Primary Service | pest control |
| Lead Offer | a free pest inspection and a clear quote for your home |
| Guarantee | if covered pests come back between your regular services, we'll come back at no extra charge |
| Referral Reward | a free month of pest service |
| Reactivation Offer | $50 off restarting your quarterly pest service |
| Seasonal Offer | $50 off your first mosquito treatment of the season |
| Service Due Offer | a free interior touch-up with your next quarterly service |
| Birthday Offer | a free month of pest service |
| Business Hours | Mon-Fri 8am-6pm, Sat 8am-12pm |
KPIs to track every week
| Metric | Goal | Where in GoHighLevel |
|---|---|---|
| Speed to lead | First contact within 5 minutes of every new lead | Conversations and the contact activity timeline in Contacts |
| Lead to inspection rate | Steadily increase the share of leads that book an inspection | Opportunities > Pipelines > Sales Pipeline (New Lead vs Inspection Booked) |
| Plan conversion rate | Grow the share of new customers who start a recurring plan instead of a one-time treatment | Contacts filtered by Service Plan Status, and Opportunities > Pipelines (Quote Sent vs Won) |
| Skipped or overdue services | Keep overdue scheduled services close to zero | Automation > Workflows > 19 Service Due stats and Contacts filtered by Last Service Date |
| Win-backs | Restart canceled plans every season | Opportunities > Reactivation pipeline (Booked stage) |
| New Google reviews | Ask after every initial service and grow reviews every week | Reputation > Overview |
Campaign ideas for your client
- Free pest inspection with a written treatment plan
- Quarterly service plan with free re-treatments between visits
- Mosquito season package for spring and summer
- Fall rodent exclusion and sealing service
- Annual termite inspection for existing customers
Compliance notes
- Don't describe pesticides or treatments as 'safe', 'non-toxic', 'harmless' or 'all natural' without qualification. The EPA and state lead agencies restrict these claims for pest control products.
- Follow your state's structural pest control rules on licensing, advertising your license number, and required paperwork for termite and wood-destroying insect inspections.
- Collect SMS consent on every form and booking page, and register A2P 10DLC with accurate descriptions of service reminders and seasonal campaigns.
- Put service plan terms, automatic renewal and cancellation policies in writing, and follow your state's automatic renewal laws for recurring billing.
- Don't ask for health details by text. If a customer mentions allergies, pregnancy or sensitive household members, move the conversation to a phone call with a licensed technician.
This is general guidance, not legal advice. Confirm the rules for your client's state and industry.